Assignment #1:
Photography Composition
Part 1: Elements of Design
Assigned: September 5th 2019
Your mission is to create a unified layout of 6 PHOTOGRAPHS that demonstrates each of the elements of composition/design. You may be as creative as you like. This is a multi-day assignment so think about how you want to your final page to appear. If there is something that you think needs to be done to the photos and you don’t know how to do it, just ask (the internet and your peers are great resources for helping).
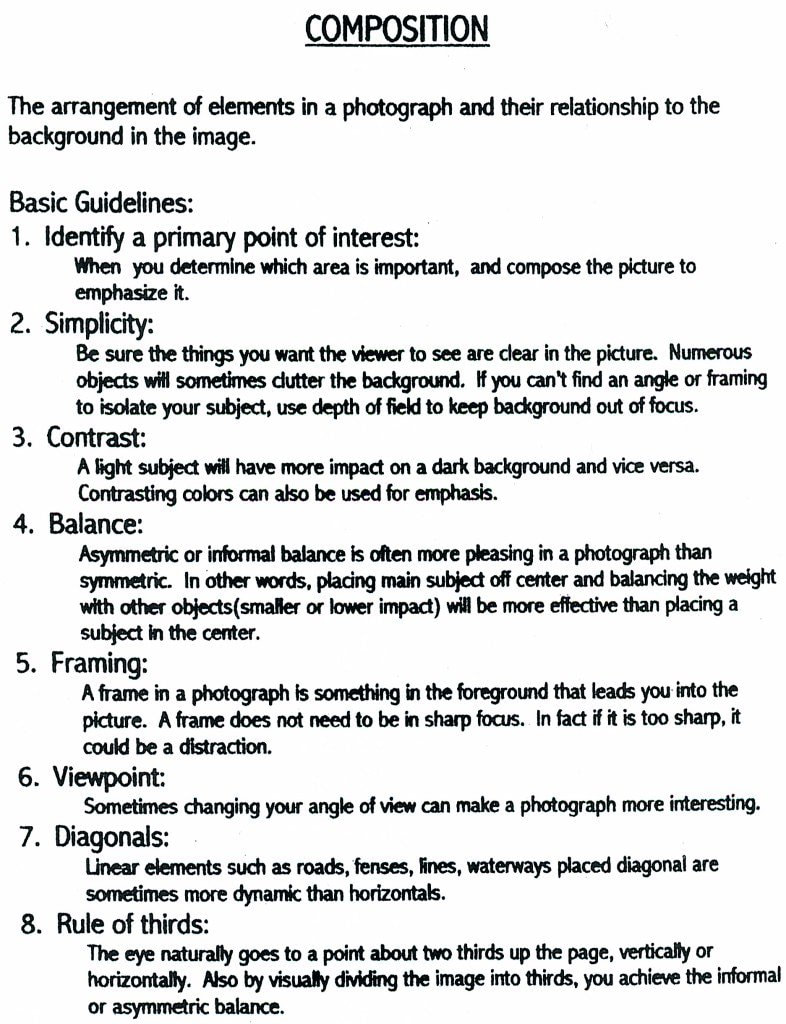
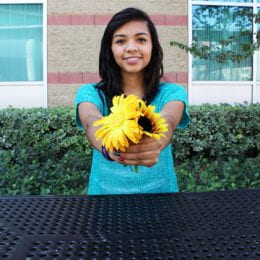
- Using the Internet or photographs you took yourself, find examples of photography which apply to the following terms.
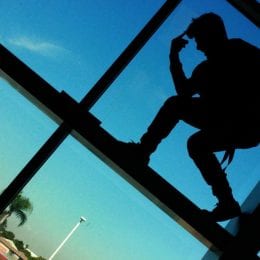
- COLOUR
- LINE
- FORM
- SHAPE
- TONE
- TEXTURE
- Collect all 6 (or more) images before opening photoshop!
- Copy and Paste them into a letter size Photoshop document.
- Please label photos. (use any advanced PhotoShop skills you have.) (300 resolution)
- Create a unified layout of all 6 images (one for each element) considering how all the photographs work together for a cohesive composition.
Part 2: Principles of Composition
Assigned September 6th, 2019
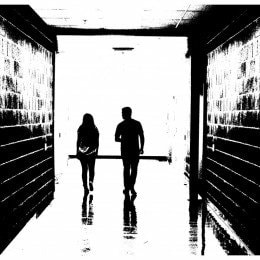
Your mission is to find photographs (images) from magazines that demonstrate the Principles of Composition. There are 13 Principles- for this assignment find examples of 6 different principles:
Pattern/Repetition
Emphasis/Focal point
Balance
Movement
Unity
Contrast
Pattern/Repetition
Emphasis/Focal point
Balance
Movement
Unity
Contrast
- Search through the magazines provided. When you see a photo you like, ask yourself which principle of composition the photograph is predominantly executing.
- NEATLY cut out the photo from the magazine. Your goal is to have clean and even edges. Please use scissors and precision knives with care and safety.
- Once you have gathered 6 images representing 6 different principled, arranged the cutouts on the black paper provided. depending on the size of your images, you may need more than one paper.
- In pencil, neatly label each image with its corresponding Principle of Composition (don't forget your name).
Part 3: Photographing the Elements and Principles of Design
Assigned Sept. 11, 2019
Step 1: Now that you're familiar with the elements and principles of design, it's your turn to take some photographs. Each student is responsible for photographing their own subject matter, one for each element and principle.
Step 2: You will upload your photographs to your drive. You may edit photographs in photoshop if like but it is not required. CREATE TWO LAYOUTS. One layout for Elements and One layout for Principles. Be as creative as you like. Please LABEL ALL PHOTOGRAPHS with the corresponding element and principle.
Step 2: You will upload your photographs to your drive. You may edit photographs in photoshop if like but it is not required. CREATE TWO LAYOUTS. One layout for Elements and One layout for Principles. Be as creative as you like. Please LABEL ALL PHOTOGRAPHS with the corresponding element and principle.
|
Elements
|
Principles
|
Assignment #2:
Aperture and Depth of Field
Assigned Sept. 13th
Explore the relationship between apertureand depth of field.The main function of a camera lens is to collect light. The aperture of a lens is the diameter of the lens opening and is usually controlled by an iris. A larger diameter of the aperture, allows more light to reach the image sensor.The objective of this assignment is to get you familiarized with aperture. Beware of long shutter speeds with small aperture, you may need to raise your ISO…
Aperture is expressed as F-stop, e.g. F2.8 or f/2.8. The smaller the F-stop number (or f/value), the larger the lens opening (aperture).
Read these two links:
http://www.macworld.com/article/1150150/depthoffield.html http://www.digitalcameraworld.com/2013/07/17/what-is-depth-of-field-how-aperture-focal-length-and-focus-control-whats-sharp/
- Go outside and take two photographs of the same subject, trying to get two different depth of fields. Remember to first format the memory card, set WB to auto and ISO to 400, and be on Manual focusing. You will set the camera mode to AV (aperture priority). Make sure to focus on the same subject for both shots you take.
- In Photo #1, you will get a shallow depth of field. Zoom out to the longest focal length of the lens which is 55mm. Set the aperture on f5.6 (the widest aperture at 55mm) and take note of what the camera sets the shutter speed at. Make sure it is not below 60th of a second. Get in good and close to your subject
- In Photo #2, you will get a good depth of field. Put your lens at 18mm ( which is the widest lens mm on your lens). Set your aperture at f20, and take note of what the camera sets the shutter speed at. Make sure it is not below 60th of a second, or open up the aperture to f11. Stay a bit further back to get a better depth of field.
- Repeat the depth of field activity 2-3 times to make sure you get it right.
- In the lab, edit your photos for maximum impact and post each one (good and shallow depth of field) to your blog as the large photo. Include the technical info in the caption section of each (Mode, ISO, Shutter speed, Fstop, Focal length of lens.
- Submit 2 examples of shallow depth of field and 2 examples of Deep depth of field. Label and state the aperture you used for each shot.
|
|
|

|
Assignment #3:
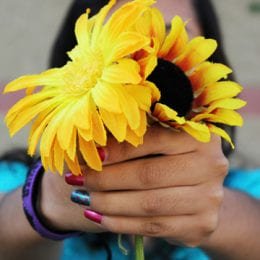
ISO Portrait with Natural Lighting
Take at least 10 portraits of a classmate on location using natural light
In the comments section:
Video Links:
What is ISO?:
https://www.youtube.com/watch?v=ouz3Hrg_iQU
An Introduction to Natural Light Portraiture: https://www.bhphotovideo.com/explora/photography/tips-and-solutions/an-introduction-to-natural-light-portraiture
Photoshop for Beginners:
https://helpx.adobe.com/photoshop/how-to/ps-basics-fundamentals.html
White Balance on a JPEG {in Photoshop, Elements and Lightroom
https://digital-photography-school.com/white-balance-on-a-jpeg-in-photoshop-elements-and-lightroom/
- Think about exposure, lighting, composition, posing and expression.
- Take 2 correctly exposed portraits in a room or area with low light. You will have to utilize higher ISOs in order to get thess image (800 and up). Try setting your ISO to 1600 or 3200 so your shutter speed does not go below 60th of a second. Open your aperture up as wide as it will go.
- Take 2 correctly exposed portraits in an area that is well lit, using more “normal” or lower ISO’s (100-400).
- Edit your photos to look their best using Photoshop or other editing software of your choice.
- Upload your edited 4-10 (minimum 4) photos to freshgrade under the assignment heading.
In the comments section:
- Number and label your photos as High or Low ISO
- List what ISO setting you used for each of your finished photographs.
- Describe the environments you took the photos in and how you had to manipulate ISO in order to correctly expose your subject in these environments.
- Critique: Find an on-location portrait online with natural lighting. Post that photo and make a list of 25 words or phrases you think of when you look at this photo. Include the photographers name if possible.
Video Links:
What is ISO?:
https://www.youtube.com/watch?v=ouz3Hrg_iQU
An Introduction to Natural Light Portraiture: https://www.bhphotovideo.com/explora/photography/tips-and-solutions/an-introduction-to-natural-light-portraiture
Photoshop for Beginners:
https://helpx.adobe.com/photoshop/how-to/ps-basics-fundamentals.html
White Balance on a JPEG {in Photoshop, Elements and Lightroom
https://digital-photography-school.com/white-balance-on-a-jpeg-in-photoshop-elements-and-lightroom/

|
|
|
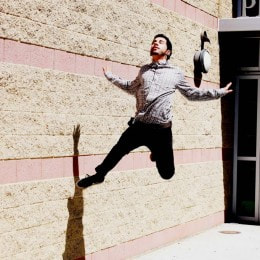
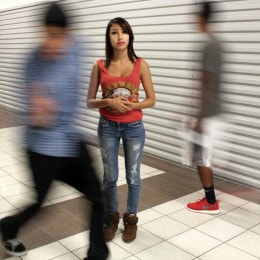
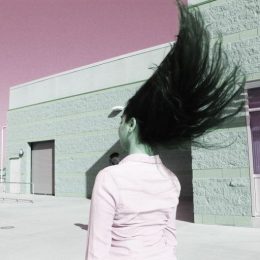
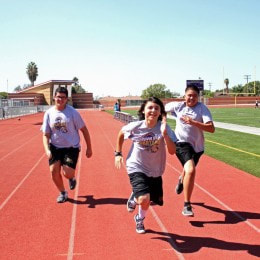
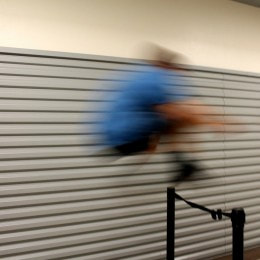
Assignment #4
CAPTURING ACTION AND MOTION IN PHOTOGRAPHY
Read these online article about capturing action and motion photography:
http://www.digital-photo-secrets.com/tip/50/freezing-the-action/
http://digital-photography-school.com/how-to-capture-motion-blur-in-photography/
What is due? 20 photos. 10 photos with a long shutter speed and 10 photos using a fast shutter speed. Submit your favourite 2 photo's using long shutter speed and 2 using fast shutter speed (edited in photoshop).
Submit a minimum of 4 photographs for this assignment.
Objective: Use shutter speed as a means of creativity.
The purpose of this assignment is to help you think of how you can use shutter speed to create unique effects in your photographs. You will most likely need a partner and a tripod for this assignment (and a camera, of course!). Use Shutter Priority Mode (TV) and Auto ISO so that you can focus on setting your shutter speed. Do a good job! Consider lighting, composition, background, etc.
|
|
|
|
|
|
Project #1:
DIGITAL COLLAGE: ALL ABOUT ME
Assigned: October 2nd
Due: October 9th
Gather imagery online that represents at least five things about yourself.
-In Photoshop, make an 8×10 or 10×8 @150 resolution document and title it All About Me Collage
-Select elements from the Internet images to move into your collage. (create a folder for your images, be organized)
-After you get a good selection with the magic wand or magnetic lasso, remember to go in Mask and refine your selection. If you want soft edges you will go to select>modify>feather.
-Think about rules of good composition when designing your layout of elements and background
-Move layers around from the layer palette, if you want to change what is on top of another element.
-To blend layers for a unique effect, you use the move tool and use Shift+ to scroll through blend modes.
-Save your work as a psd until you are completely done with it, and then save as a jpeg to post to your SWAY portfolio.
Video Links:
https://youtu.be/MH1OsppSZEw
Reflection: In full sentences (paragraphs) answer the following questions:

|
|

|

|

|

|
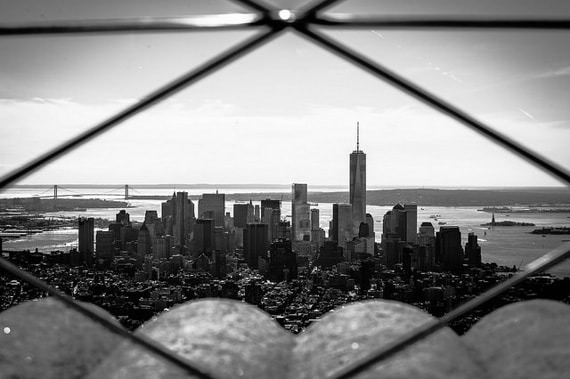
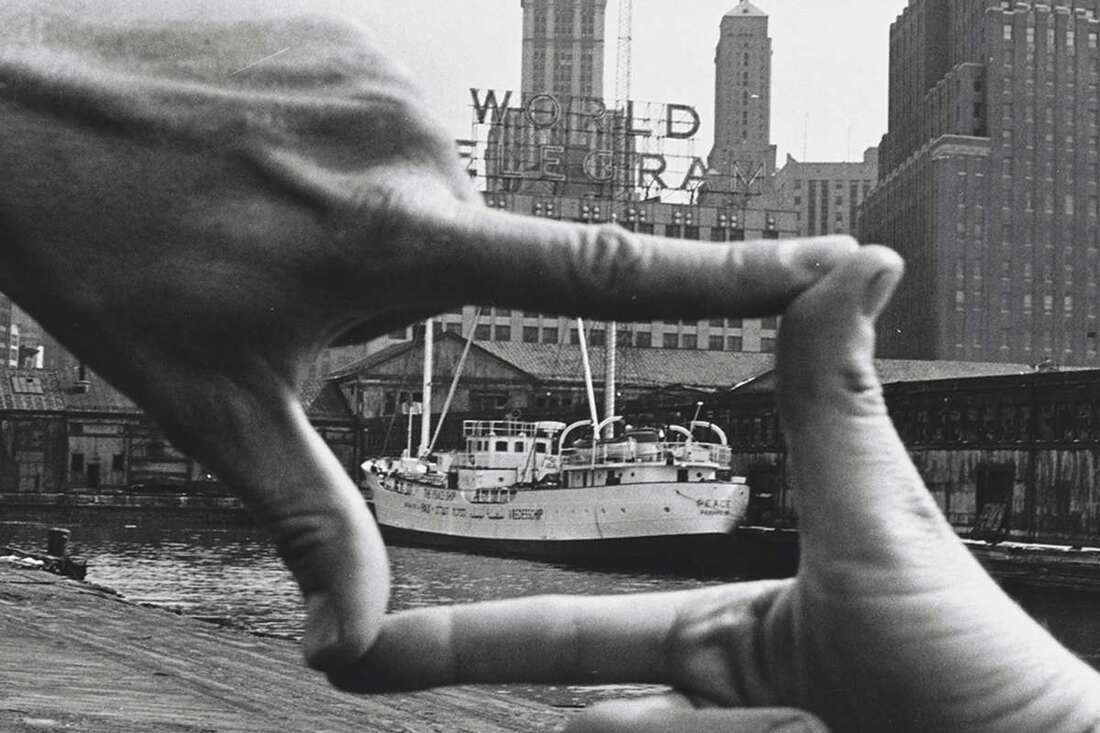
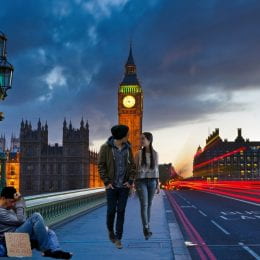
Assignment:
FRAMING A SUBJECT
Assigned: October 15th
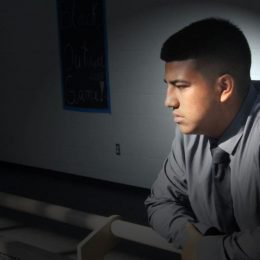
Take at least 3 different photographs using framing in the composition. Post 2-3 of your photographs, EDITED of course. Include the technical info: MASIL ( Mode, Aperture, Shutter, ISO, Focal Length) . SAMPLES BELOW -Critique your own photographs you posted and answer these questions.
- Do I have a strong composition?
- How well did I edit my photographs?
- What would I do differently if I shot this assignment again?
- Do you think your photographs belong on the blog home page and should be considered one of the best from all the photo classes?
|
|
|

|
|
|
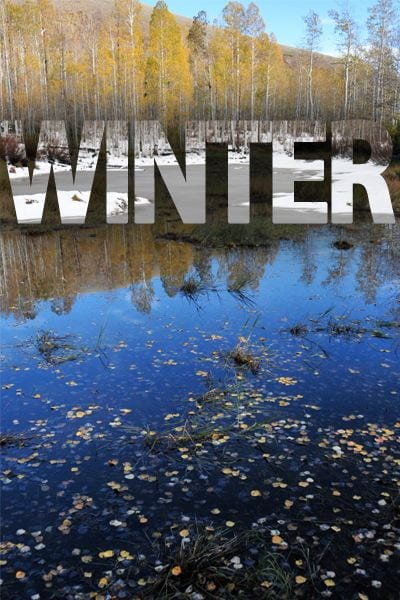
Assignment:
PHOTO WORDS DEFINED
Assigned: October 17th
Define these words in a word document and then copy and paste your definitions your SWAY titled Photography Definitions:pixel, image resolution, megabyte, megapixel, gigabyte, jpeg, raw, tiff, png, white balance, histogram, aperture, shutter speed, depth of field, aperture priority, shutter priority, ISO, bitmap, exposure, watermarking, optical zoom, digital zoom, bracketing, light meter, image stabilization, noise, lag time, hot shoe, fisheye, macro, telephoto, wide angle, DSLR, dynamic range, exposure compensation
Assignment:
FAVORITE PHOTO (SO FAR)
Assigned: October 18th
Choose a photograph that you've taken. Think about editing/cropping the photograph to make the composition stronger. Write a paragraph responding to the following questions.
1. Why this is your favorite photo?
2. What makes this photograph strong? Think about which compositional elements and principles your photograph is using. Does your photograph convey emotion or make a statement in some way.
Project:
TAKE A VACATION
Assigned: October 29th
Due: November 7th
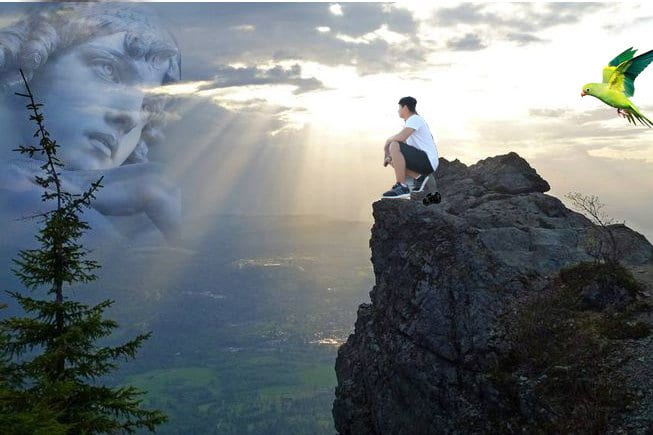
In this assignment you are going to go on a virtual vacation. Find a location online where you would like to go and digitally put yourself into that location. Make sure to match lighting and color balance to make it look realistic as possible.
Make your new document for all the elements in the image a 12×8 150 resolution.
Include 2-3 sentences with your photo on SWAY when you post it to explain why you would like to go on this vacation and/or the intention behind your photoshop image.
Green Screen Removal in Photoshop (Video) https://youtu.be/tqUBcMv50ZM
How to: Remove Green Screen Background in Photoshop (Tutorial):https://photographysandbox.wordpress.com/2015/01/19/remove-green-screen-photoshop/
|
|
|
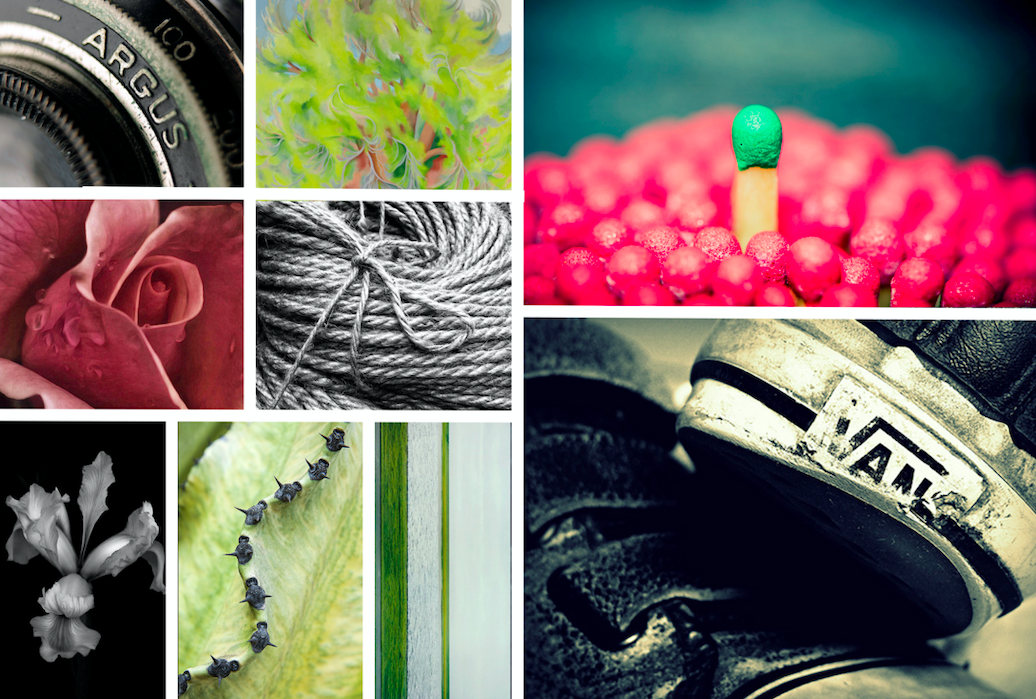
Project:
STILL LIFE: ONE OBJECT, MULTIPLE VIEWS
Essential Question:
How can representation of an object through photography reveal or relate connections to life and human experience?
You will be submitting 9 of your best photographs in a unified layout. **See instructions
Instructions:
1. Select ONE object for your still life photography.
2. Take a minimum of 40 photographs of this object.
Explore different VIEWPOINTS/ANGLES and CLOSE-UP shots as well as NATURAL LIGHTING and STUDIO LIGHTING.
- Different Viewpoints for each photo. Each photo should be distinctly different.
- Varied Close-up shots. Interesting details. Abstraction.
- Include both studio and natural light photos.
- Minimum of 4 different backgrounds/backdrops. Explore the black and white backdrops with studio and natural lighting.
- Include a BLACK AND WHITE photo. (Edited in photoshop, or taken with camera settings)
Focus on the following:
Simplicity
Contrast
Texture
Colour
Repetition
Movement
Tone
Shadows
3. Select your strongest/favorite 9 photo’s. Edit in photoshop.
Cropping- What is the composition of your photo? Is there unnecessary space in the frame?
Lighting- Is there contrast of light and dark? White balance?
Colour- Can you alter your colours in some way to create a mood/feeling?
4. Create a new document in photoshop. Choose your layout:
Landscape: 22 x 15
Portrait: 16 x 21
5. Arrange your photographs focusing on composition and design. Select your strongest/favorite photograph (or two) and make this larger than the rest. This will be your focal point of your composition.
Follow this Tutorial to make your layout/collage of all 9 images:
How to make a photo collage in Photoshop CC:
https://www.creativebloq.com/how-to/make-a-photo-collage-in-photoshop-cc
EXAMPLE: your Collage of 9 images should look similar to this. Make your own creative/design decisions for the sizes of your photos as well as the layout. ***your images should go to the very edge of the page.

|
|
Project:
WORD ART
Assigned: Monday Dec. 18th
Due: Friday Dec 22nd
-Make a Photoshop document 4×6 or 6×4
-Find an interesting image on the Internet and use the move tool to move it into your document in Photoshop
-Size it with Control T + shift to fit in the document
-Make another document the same size as the first
-With the Text Tool, type a word or phrase in a thick black font
-Find a picture online to go inside of the word and copy and paste it into the document with the text
-Put the picture layer on top of the word layer
-Press Control +Alt + G to put the image inside the word.
-Merge the picture and text layers together (make the background layer invisible to not include it in the merge)
-Move the word with the picture in it in the other document with the Internet image, and save as a .jpeg. Post to blog.


|

|
Assignment:
WHITE BALANCE READ AND WRITE
Assigned: Monday Dec. 18th
Due: Friday Dec 22nd
http://digital-photography-school.com/introduction-to-white-balance/
Read this link on white balance and on your SWAY, write a one paragraph synopsis of what you learned from reading the article. Under that list all the white balance settings and one sentence about each.
Read this link on white balance and on your SWAY, write a one paragraph synopsis of what you learned from reading the article. Under that list all the white balance settings and one sentence about each.
Project:
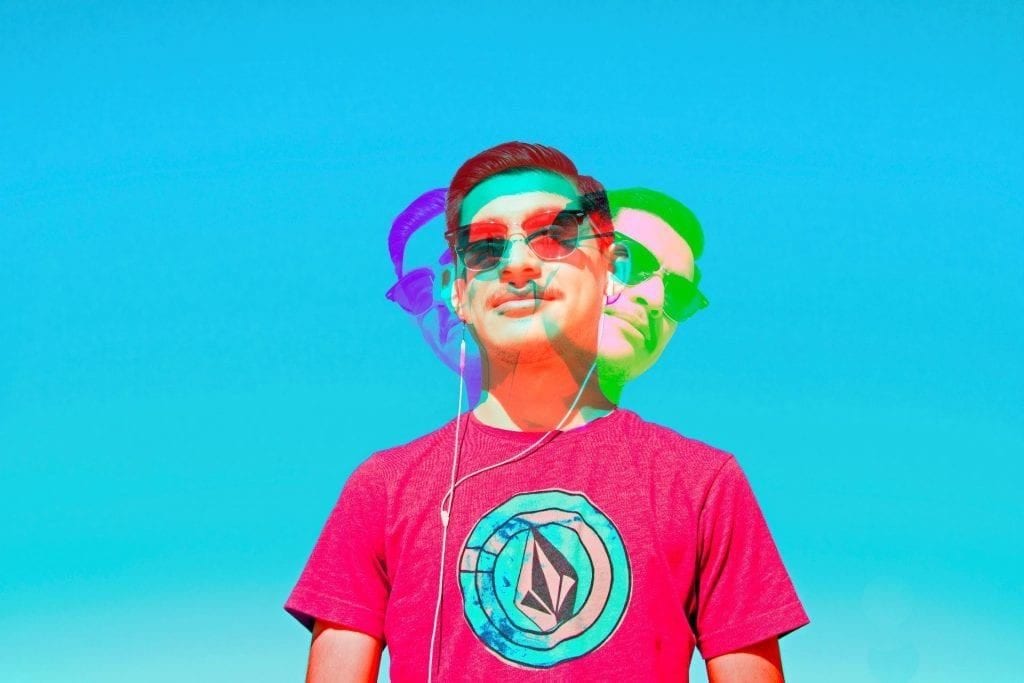
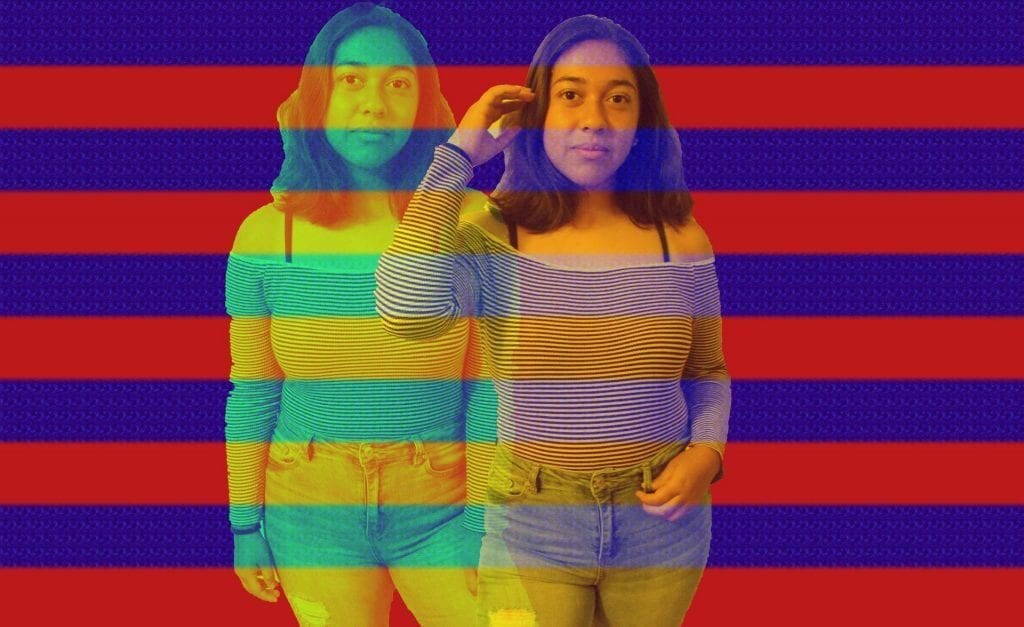
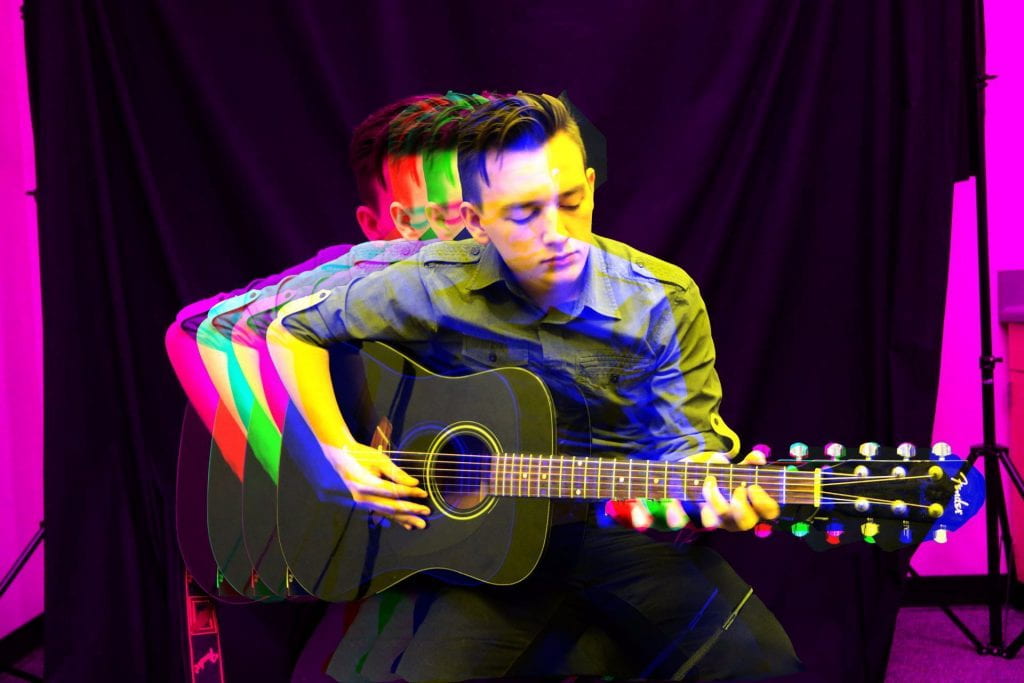
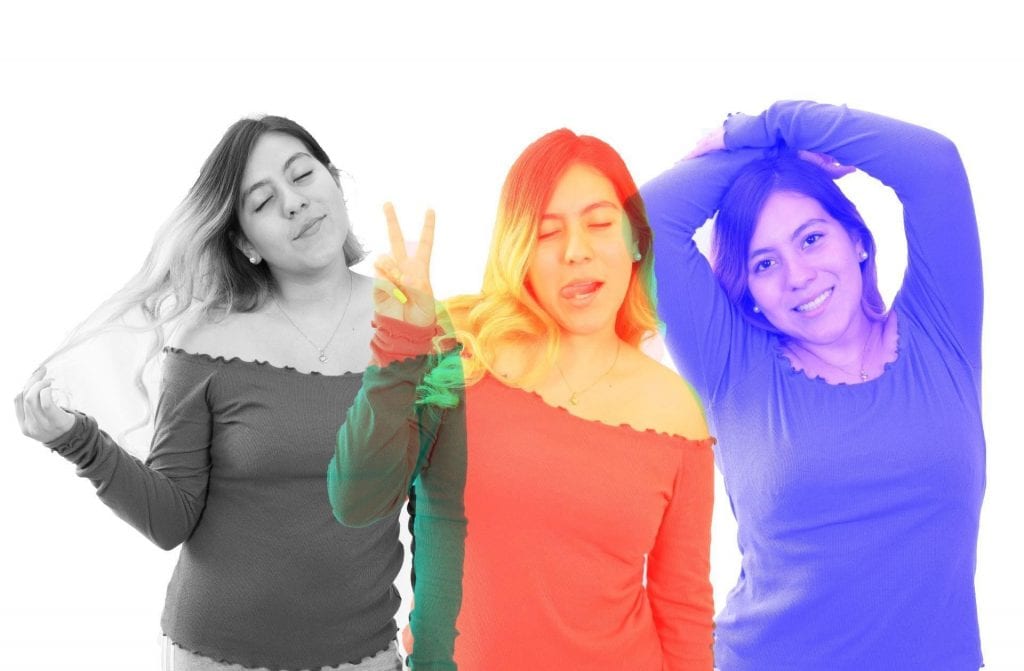
DOUBLE COLOR EXPOSURES
Assigned: Tuesday Nov. 26th
Due: Friday Nov. 29th
You will be creating a Double Color Exposure using Photoshop and Portraits to create a color fringing look. You will be taking portraits of your partner in two (or three) different angles. You will need to fill the frame and make sure you shoot from the waist up. It is your decision on the orientation of the images. Although, you will need to make sure that the two images you choose to use are orientated the same way. For example, both should be either horizontal or vertical.
You need 6 different poses: 3- side view and 3-front view. This will allow you to try various color combinations. You must shoot your images on a blank, clean background. The studio works best, but if you can find a nice solid background outside that will work just fine.
Bring both images into Photoshop, open a new document and and place both images in, onto two separate layers.Then on the top layer click the fx tool [layer styles]button at the bottom of the Layers Palette.
Uncheck the R G B boxes in the ADVANCED BLENDING SECTION. As you click the boxes one-by-one you will see your image change colors!
Once you get the color combination you like hit OK.
Then if there is left over space after adjusting where you want the images to be, SELECT a slice of the image with the correct color [make sure it is just the background and does not contain any of the subject inside] using the MARQUEE TOOL.
Then CLICK CTRL/CMD T and it will turn your selection into the bounding boxes to transform it. Pull from the side to stretch it out.
Then ADD and ADJUSTMENT LAYER [SELECTIVE COLOR] to refine the color combinations you chose.
FLATTEN LAYERS and then SAVE for OUTPUT.
https://www.youtube.com/watch?v=TcG6OeYtens
https://youtu.be/TcG6OeYtens
|
|
|
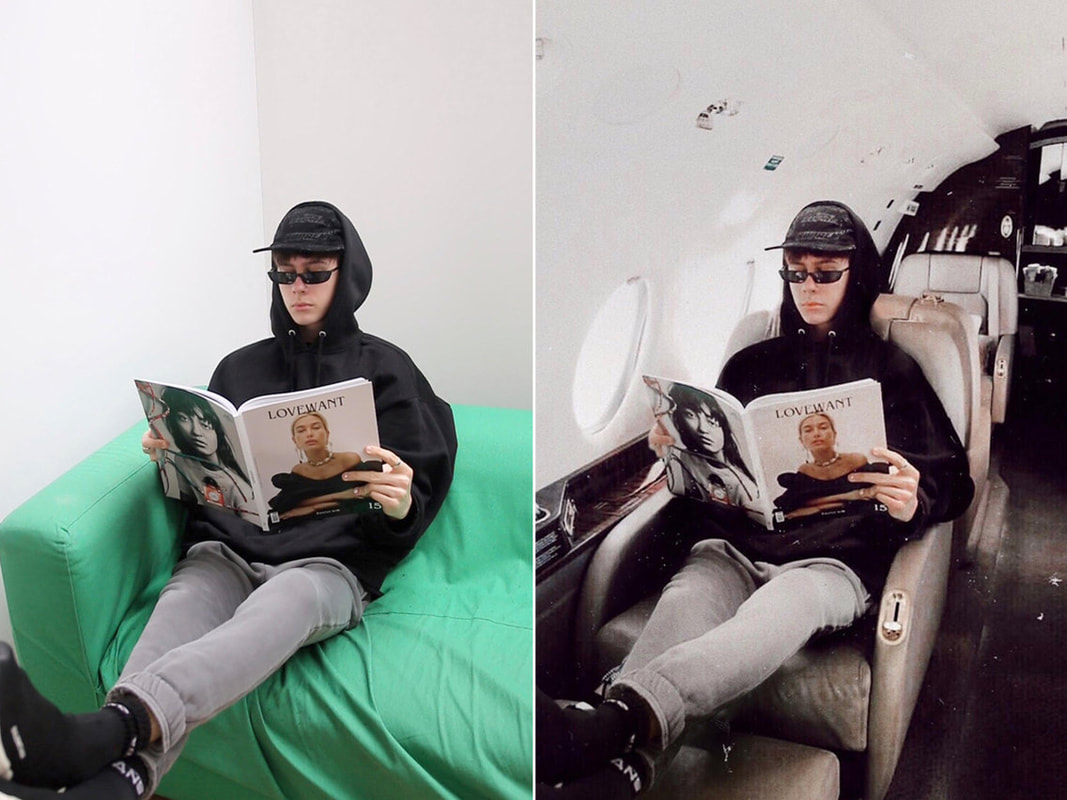
Project:
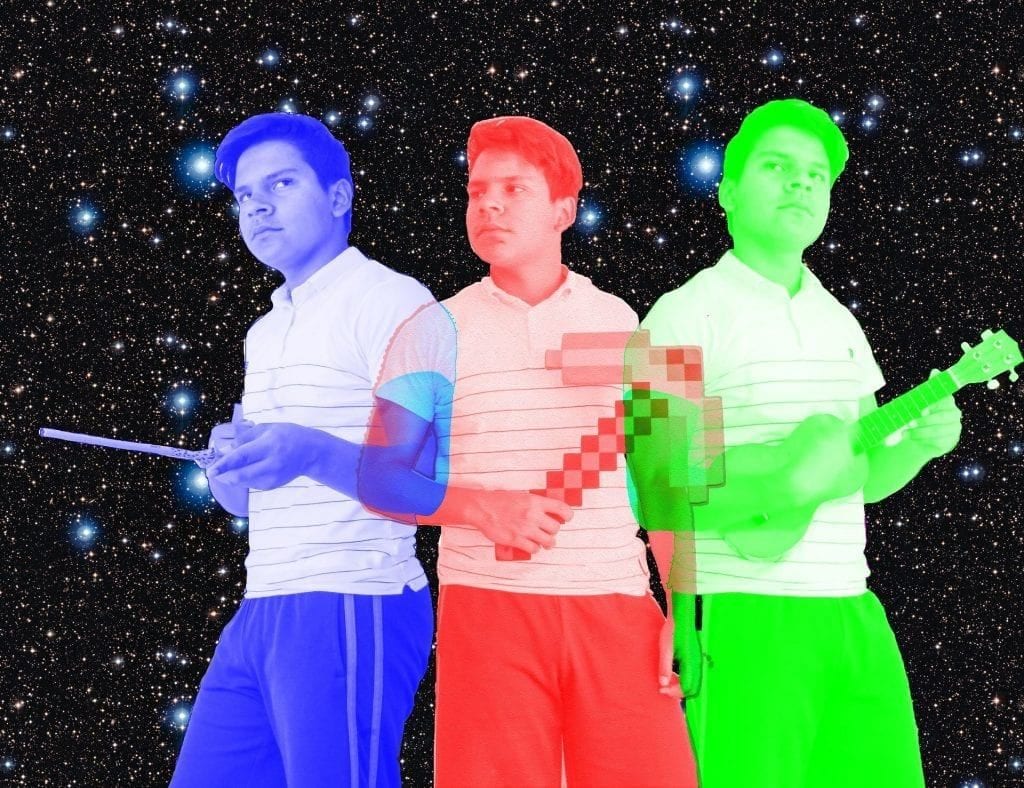
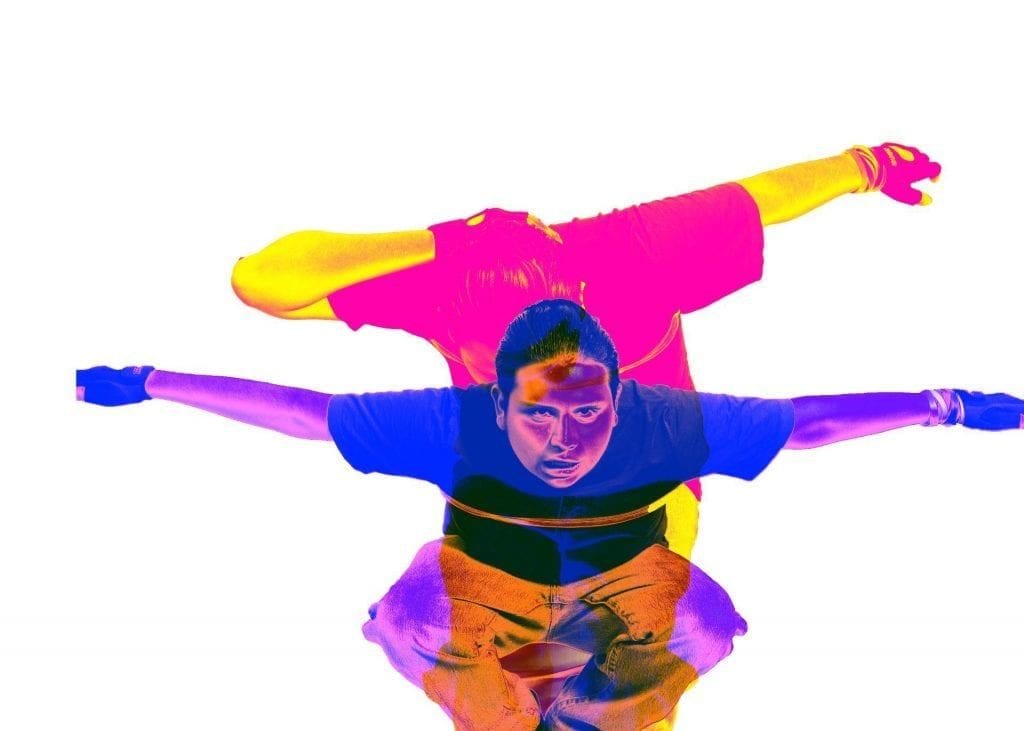
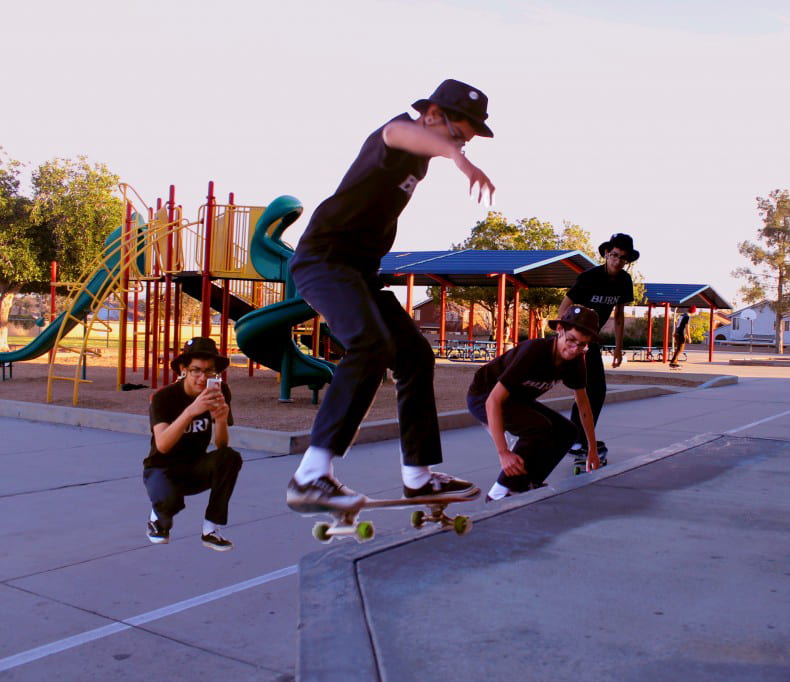
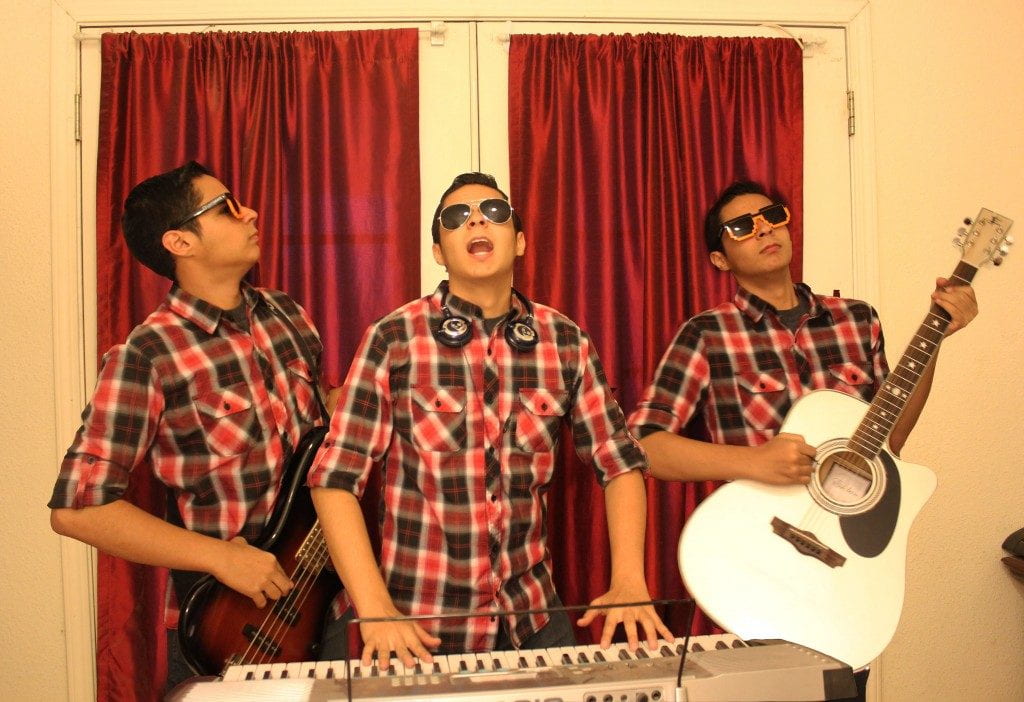
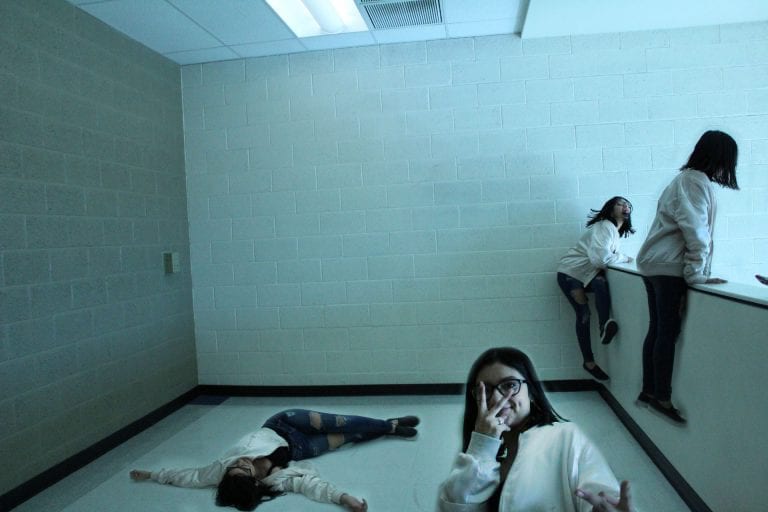
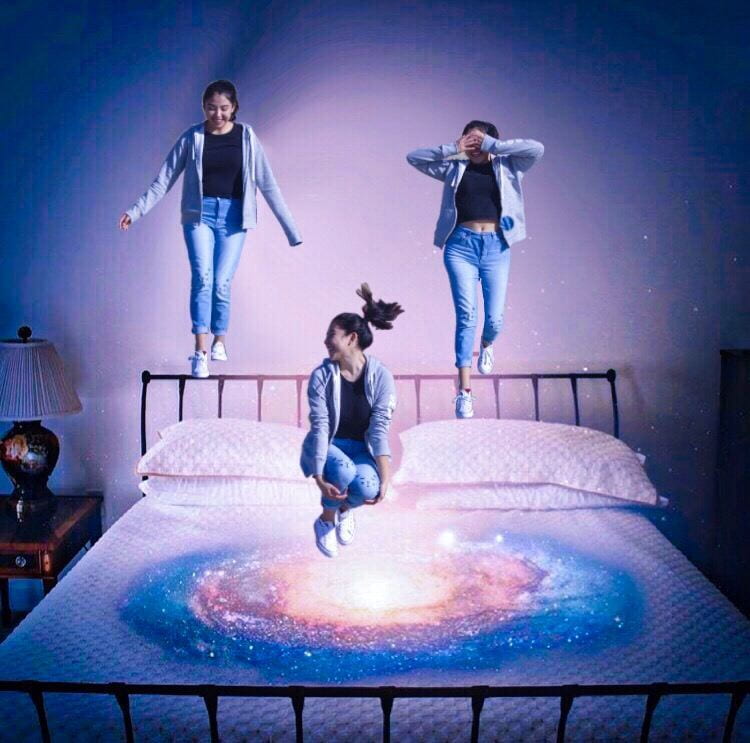
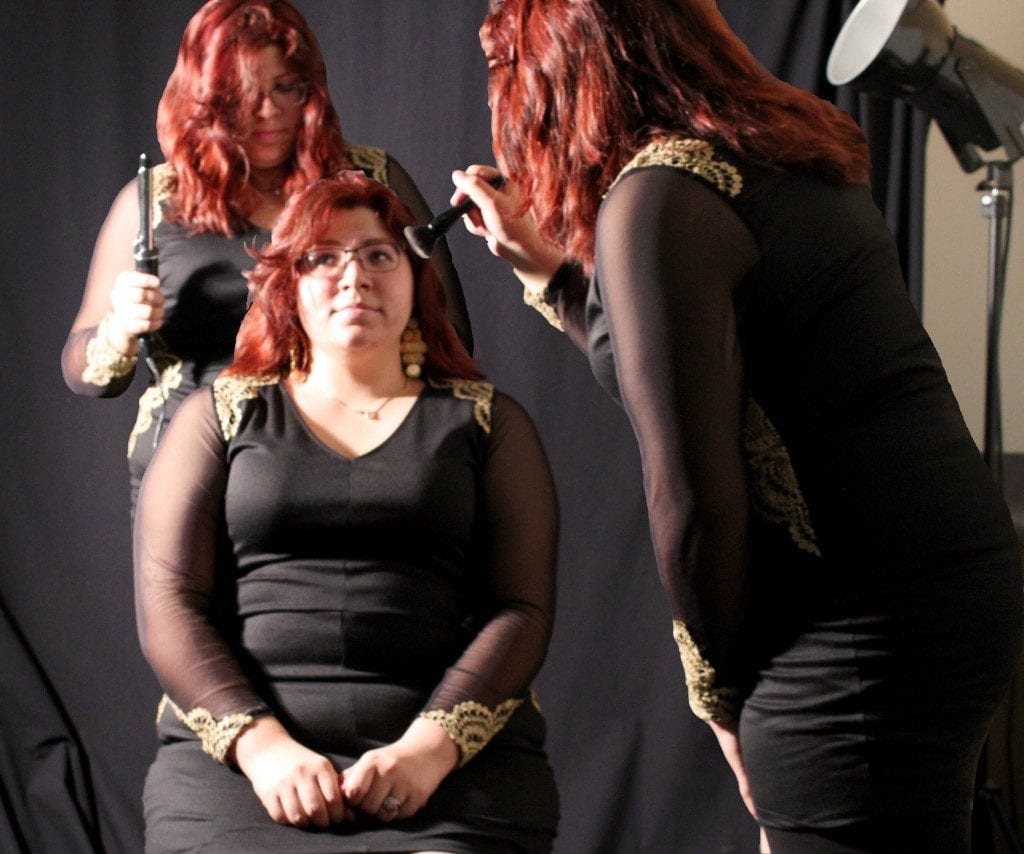
AM I TALKING TO MYSELF
Assigned: Monday Dec. 2nd
Due: Friday Dec. 5th
Photograph several images of yourself or someone else in the same location, and put them all together in Photoshop to make it look as if you (or they) are relating to themselves in some way.
Use one of the photos as the base image, and move the other subjects in the base image to create a unique photo for this Am I Talking To Myself assignment.
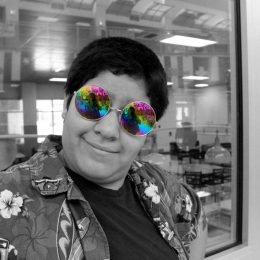
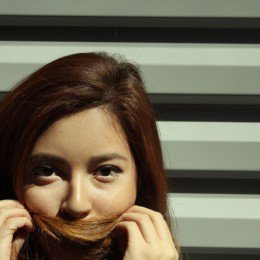
Writing Critique: Make a SWAY post called My Inspiration and list 15-20 things, which inspire your creativity. Sample student work below:
Use one of the photos as the base image, and move the other subjects in the base image to create a unique photo for this Am I Talking To Myself assignment.
Writing Critique: Make a SWAY post called My Inspiration and list 15-20 things, which inspire your creativity. Sample student work below:
|
|
Project:
PHOTOGRAPHY RESEARCH PROJECT (Part 1 of 4)
Assigned: Dec. 6th
Due: In class, Monday Dec. 9th
From the list of photographers here (or on your own), choose 3 photographers that intrigue you in some way.
ADD TO SWAY
For each Photographer you've chosen you will include:
https://www.all-about-photo.com/photographers/A-Z-photographers.php
ADD TO SWAY
For each Photographer you've chosen you will include:
- Name of Photographer
- One image, Include Title of work and date.
- Genre, Movement or Theme the photo/photographer is working in.
- Answer: Why did you choose this image/find intriguing or interesting?
https://www.all-about-photo.com/photographers/A-Z-photographers.php
PHOTOGRAPHY RESEARCH PROJECT (Part 2 of 4)
Assigned: Dec. 10th
Due: Friday Dec. 13th
Choose a Photographer to research, and record the relevant information below. Be sure to record your 3 sources! No Wikipedia. You may use Wikipedia only if you follow and source the original source.
Please post your answers ONLY on your SWAY along with the Photographer’s images that inspired you.
Name of Artist:
Dates of Artist’s Life:
1. Personal Background: (5 sentences. Culture, nationality, schooling, important life events, etc.)
2. Style: (5 sentences. What visual characteristics does this artist’s work possess? If you can compare it to a painting or art history style please do.)
3. Philosophy: (5 sentences. What were the major ideas behind this artist’s work? Where they personal, political, social, etc. What were they trying to “say” with their photographs?)
4. Influences: (5 sentences. How has the photographer influenced or inspired you in your work?)
5. Sources: You need to include the 3 images, their title and their source (which may include a link).
PHOTOGRAPHY RESEARCH PROJECT (Part 3 of 4)
Assigned: Dec. 12th
Due: Friday Dec. 20th
Analyze how your photographer has taken their photographs. Submit 10 photographs in the same style or are inspired by your photographers context or theme.
You will need to consider:
What settings on your camera might you use to create a similar photograph?
What is the narrative, context, or theme behind my own photographs?
You will need to consider:
What settings on your camera might you use to create a similar photograph?
What is the narrative, context, or theme behind my own photographs?
PHOTOGRAPHY RESEARCH PRESENTATION AND CRITIQUE (Part 4 of 4)
Assigned:Jan. 6th 2020
Due: Jan. 8th 2020
Create a powerpoint presentation comparing and showcasing your chosen photographer along with your favourite/ most successful photograph you have taken that was inspired by this photographer.
Submit to Teams
Your presentation should include:
Submit to Teams
Your presentation should include:
- One or more works by your chosen photographer (name, date, title).
- What genre and or theme this photographer is working in.
- What makes this photographers work important or significant.
- One or more photographs of your own that were inspired by this photographer.
- Based on your research, tell us what aspect(s) you took as inspiration for your photographs. Tell us what is similar, what is different.
Assignment:
TED TALK RESPONSE: "HOW PHOTOGRAPHY CONNECTS US"
Assigned: Jan. 6th 2020
Due: Jan. 7th 2020
Watch this Ted Talk on how photography connects us and on your SWAY make a post summarizing, critiquing, judging and evaluating what you got out of watching the video. Have at least 1 paragraph.
https://www.ted.com/talks/frans_lanting_the_story_of_life_in_photographs#t-8273
https://www.ted.com/talks/frans_lanting_the_story_of_life_in_photographs#t-8273
Assignment:
PHOTOMONTAGE a la DAVID HOCKNEY
Assigned: January 9th 2020
Due:
Construct a photo montage similar to the work of David Hockney. Make sure to use your own photography for this assignment.
After learning about artist David Hockney and viewing several of his photo collages,
choose one subject or scene to photograph so you can create David Hockney
inspired artwork.
Consider the three different ways he took his images:
1-straight forward images
2-showing image over time
3-different perspectives in one image
Tips for taking pictures:
- Choose an interesting subject to photograph (can be anything and should be photographed during the day to get the best possible lighting and colors).
- Standing in one area zoom your camera into the subject/area and begin taking photos of different parts of the subject. It is very important that you do not change your location too much and do not change the camera’s zoom as this will make the pieces not fit together properly.
- All 40+ pictures should be taken in one sitting.
- Take more pictures than you think you need to prevent missing areas in your finished artwork.
- Make sure to include the area around the subject as you may choose to include this in your final
artwork. - Once you have finished taking your photos bring your pictures into class and upload them to a folder.
- Create a new document in Photoshop (file>new) Make it 10000x10000 pixels. This will give you a very large blank canvas to add your photos to.
- Next, open your photos in Photoshop. (You may want to only open the ones you think you may actually be using)
- Use the Move Tool to drag each photo on to the blank canvas. Begin piecing them together as you add them in (keep them as their own layers so you can make adjustments to each image if needed).
- Once photos are laid-out use the Crop Tool to crop the excess white canvas around artwork (do not crop any of the pictures!)
- Edit each layer (using Image Adjustments) so that all the photos have good contrast and are all matching in colors. This may take a long time as you will need to do this to all your layers.
- Examples of this type of work are David Hockney at:
http://www.hockneypictures.com/photos/photos_collages_04.php
Project:
REFLECTIONS
Assigned: January 9th 2020
Due:
Background:
“Using reflections in photography can lead to some amazing effects and beautiful images. ...
The wonderful thing about using reflections when taking photos is that they can completely alter the image from something fairly straightforward to something richer or abstract or otherwise more artistic.
... creativity and good-quality photos depend on the photographer being able to see things differently, rather than seeing only one part of a larger whole.”
http://www.smashingmagazine.com/2008/11/30/50-beautiful-examples-of-reflections-photography/
Project:
- Take a set of twenty photos in which you capture reflections in a creative way.
- You may use water, windows, or any other reflective surface, but you may not use a single
mirror. - Fill the frame for maximum impact.
- Use correct exposure for the lighting in the scene. Consider your camera settings; aperture, shutter, ISO, white balance,
- Select your best 6 or more photos. Edit photo's if necessary in photoshop to showcase your knowledge and skills with composition
- Add your image set to your SWAY portfolio.
